Obstetric imaging
The ultrasound examination of the members, follow the guide !
The purpose of this review is to eliminate an anomaly in the number, size, shape of the proximal and disrate segments of the four limbs and to propose a perceptive examination of the belts, joints and ends.
Image Settings
A decrease in the gain results in a good contrast between the bone and the soft parts. Bone parts appear very hyperechogenic with a posterior shadow cone. This aspect is related to bone density, interface with the underlying soft parts and ultrasonic attenuation. Only the closest part of the probe is visible on a few millimeters in 2D.
Conduct of Review
Proceed systematically.
Top Members
Let's start with the nearest upper member of the probe. We define its laterality using the fetal presentation and the side of the back. For example, a fetus in a cephalic presentation back to the left (most common situation) will present its upper right member under the probe. In the 1th quarter, the stomach position is a good element in identifying the left of the fetus. We sweep this first limb from its root, the moped. By aligning the axis of the probe with that of the humerus, we control its straight appearance (Figures 1 to 4).
(1) Turn the probe 90° and descend to the forearm, the presence of the two bones of the probe will be checked in axial cross-section (2), and then a new rotation of the probe will align them. The radius spotting is possible thanks to the thumb on the same side. The axis of the hand, especially in the 1st quarter, is controlled to eliminate a hand bote. The bote hand is a hand fixed towards the inside at an acute angle with the forearm. The examination of the hand shows 5 fingers including the thumb where it is interesting to spot the two phalanges (3). The hand scanning in an axial cross section allows the absence of 6erayon, especially post-axial (4). The separation of the fingers by the amniotic fluid interposition can also be checked when the hand is opened in axial cross section. The hand must be seen open at least once during the examination.
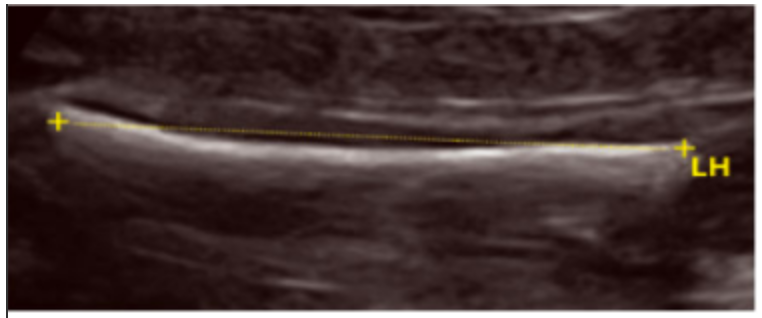
Figure 1: Arm cut, humeral length.
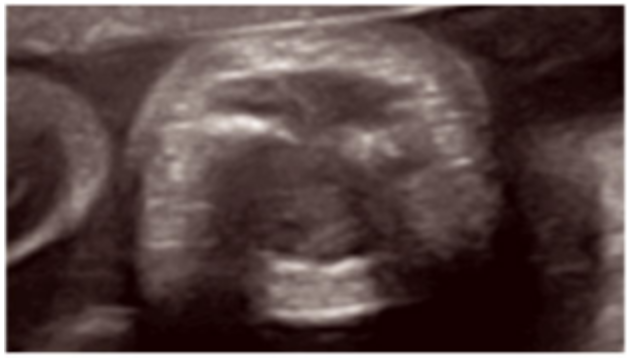
Figure 2: Axial cutting of the forearm.
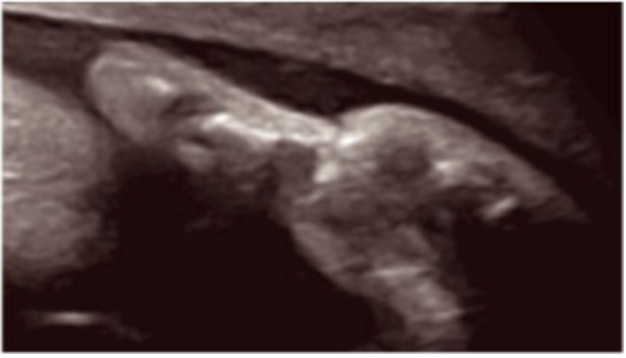
Figure 3: Two thumb phalanges.
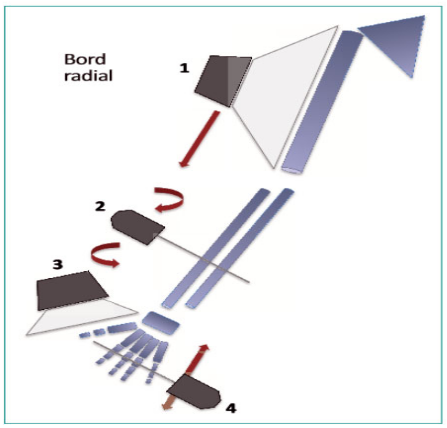
Upper and lower member radial edge diagram with probe moves and expected snapshots.
• The upper member controlateral
His examination is carried out with the same systematization. It is sometimes more delicate because of its deeper position. The 1st and 2th quarters are key moments of control. In fact, it is sometimes very difficult in the 3th quarter. Increasing the depth of the field and mobilizing the fetus can sometimes facilitate the scanning of the controlateral limb in the 3th quarter.
Lower Members
Start from the root of the thigh nearest to the probe (Figures 5 to 8). Align the probe and femur axes horizontally (5). We check the absence of femoral incurvation. First by the outer face of the thigh allows the study of femoral biometrics. The proximal femoral angle is analyzed if necessary. Translate the probe to the knee where a check is made of the lower femoral ossification points of Béchard and Todd’s upper tibial (6) that are visible in the 3th quarter. The examination continues with the two bones of the leg, which should be counted in the axial cross section and then aligned in the frontal plane. This frontal plane ensures the correct orientation of the ankle with the heel in the axis of the two bones of the leg (7). This technique is complementary to the study of the planar vault for the identification of foot malpositions. The foot examination then continues with the planar vault whose inner edge does not present the typical incurvation of equine varus feet (8). The foot position study is available after the 12th week of amenorrhea; before this term, the ankles are still in varus. Sometimes the ankle position study is laborious in the 3th quarter. You have to be paid and mobilize the feet of the fetus that are plated against the uterine walls. The toes can also be counted. The use of 3D is sometimes a valuable help in the examination of bone parts in case of shape pathology or structure of long bones... to follow.

Figure 5: Front cut of the thigh, outer first. Female Length.
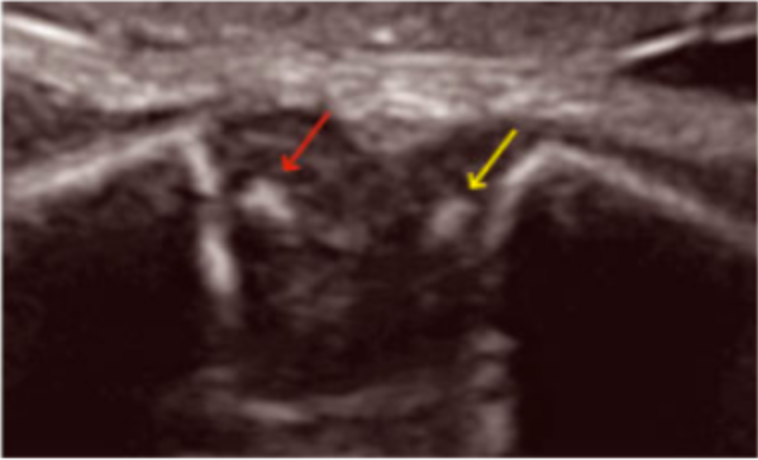
Figure 6: Lower femoral ossification points (yellow arrow) and upper tibial points (red arrow) in the 3th quarter.

Diagram of the lower limb (ankle in the orange axis and toe in purple) with spacing of the probe and expected snapshots.
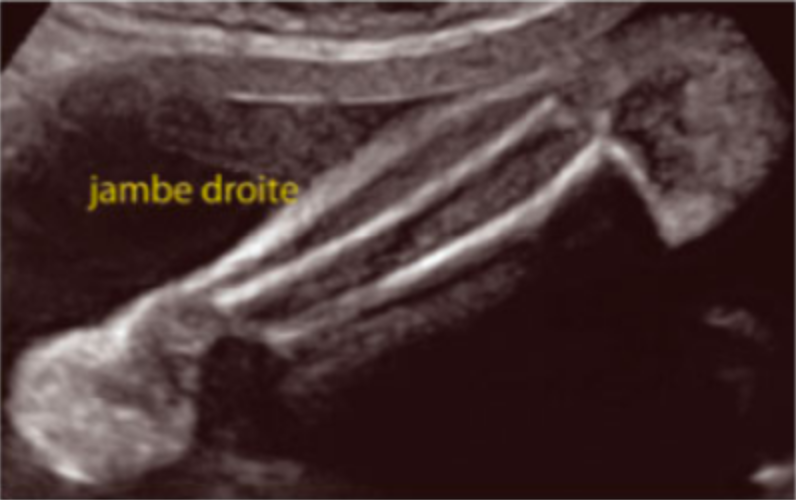
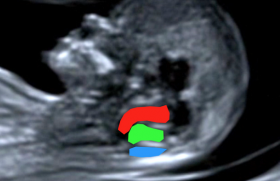
Figure 7: Two bones of the leg and ankle in the axis.
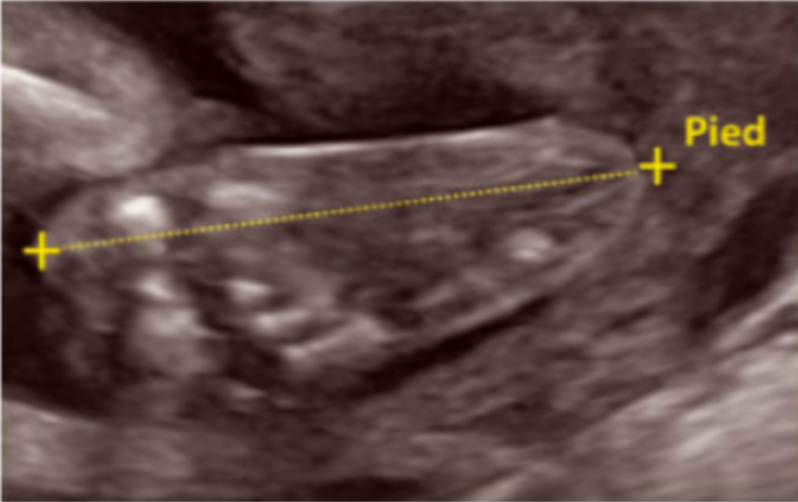
Figure 8: Inner edge foot plant straight.
Articles on the same theme
- <
- 2 of 2